John Muir Trail Gear List (lightweight)
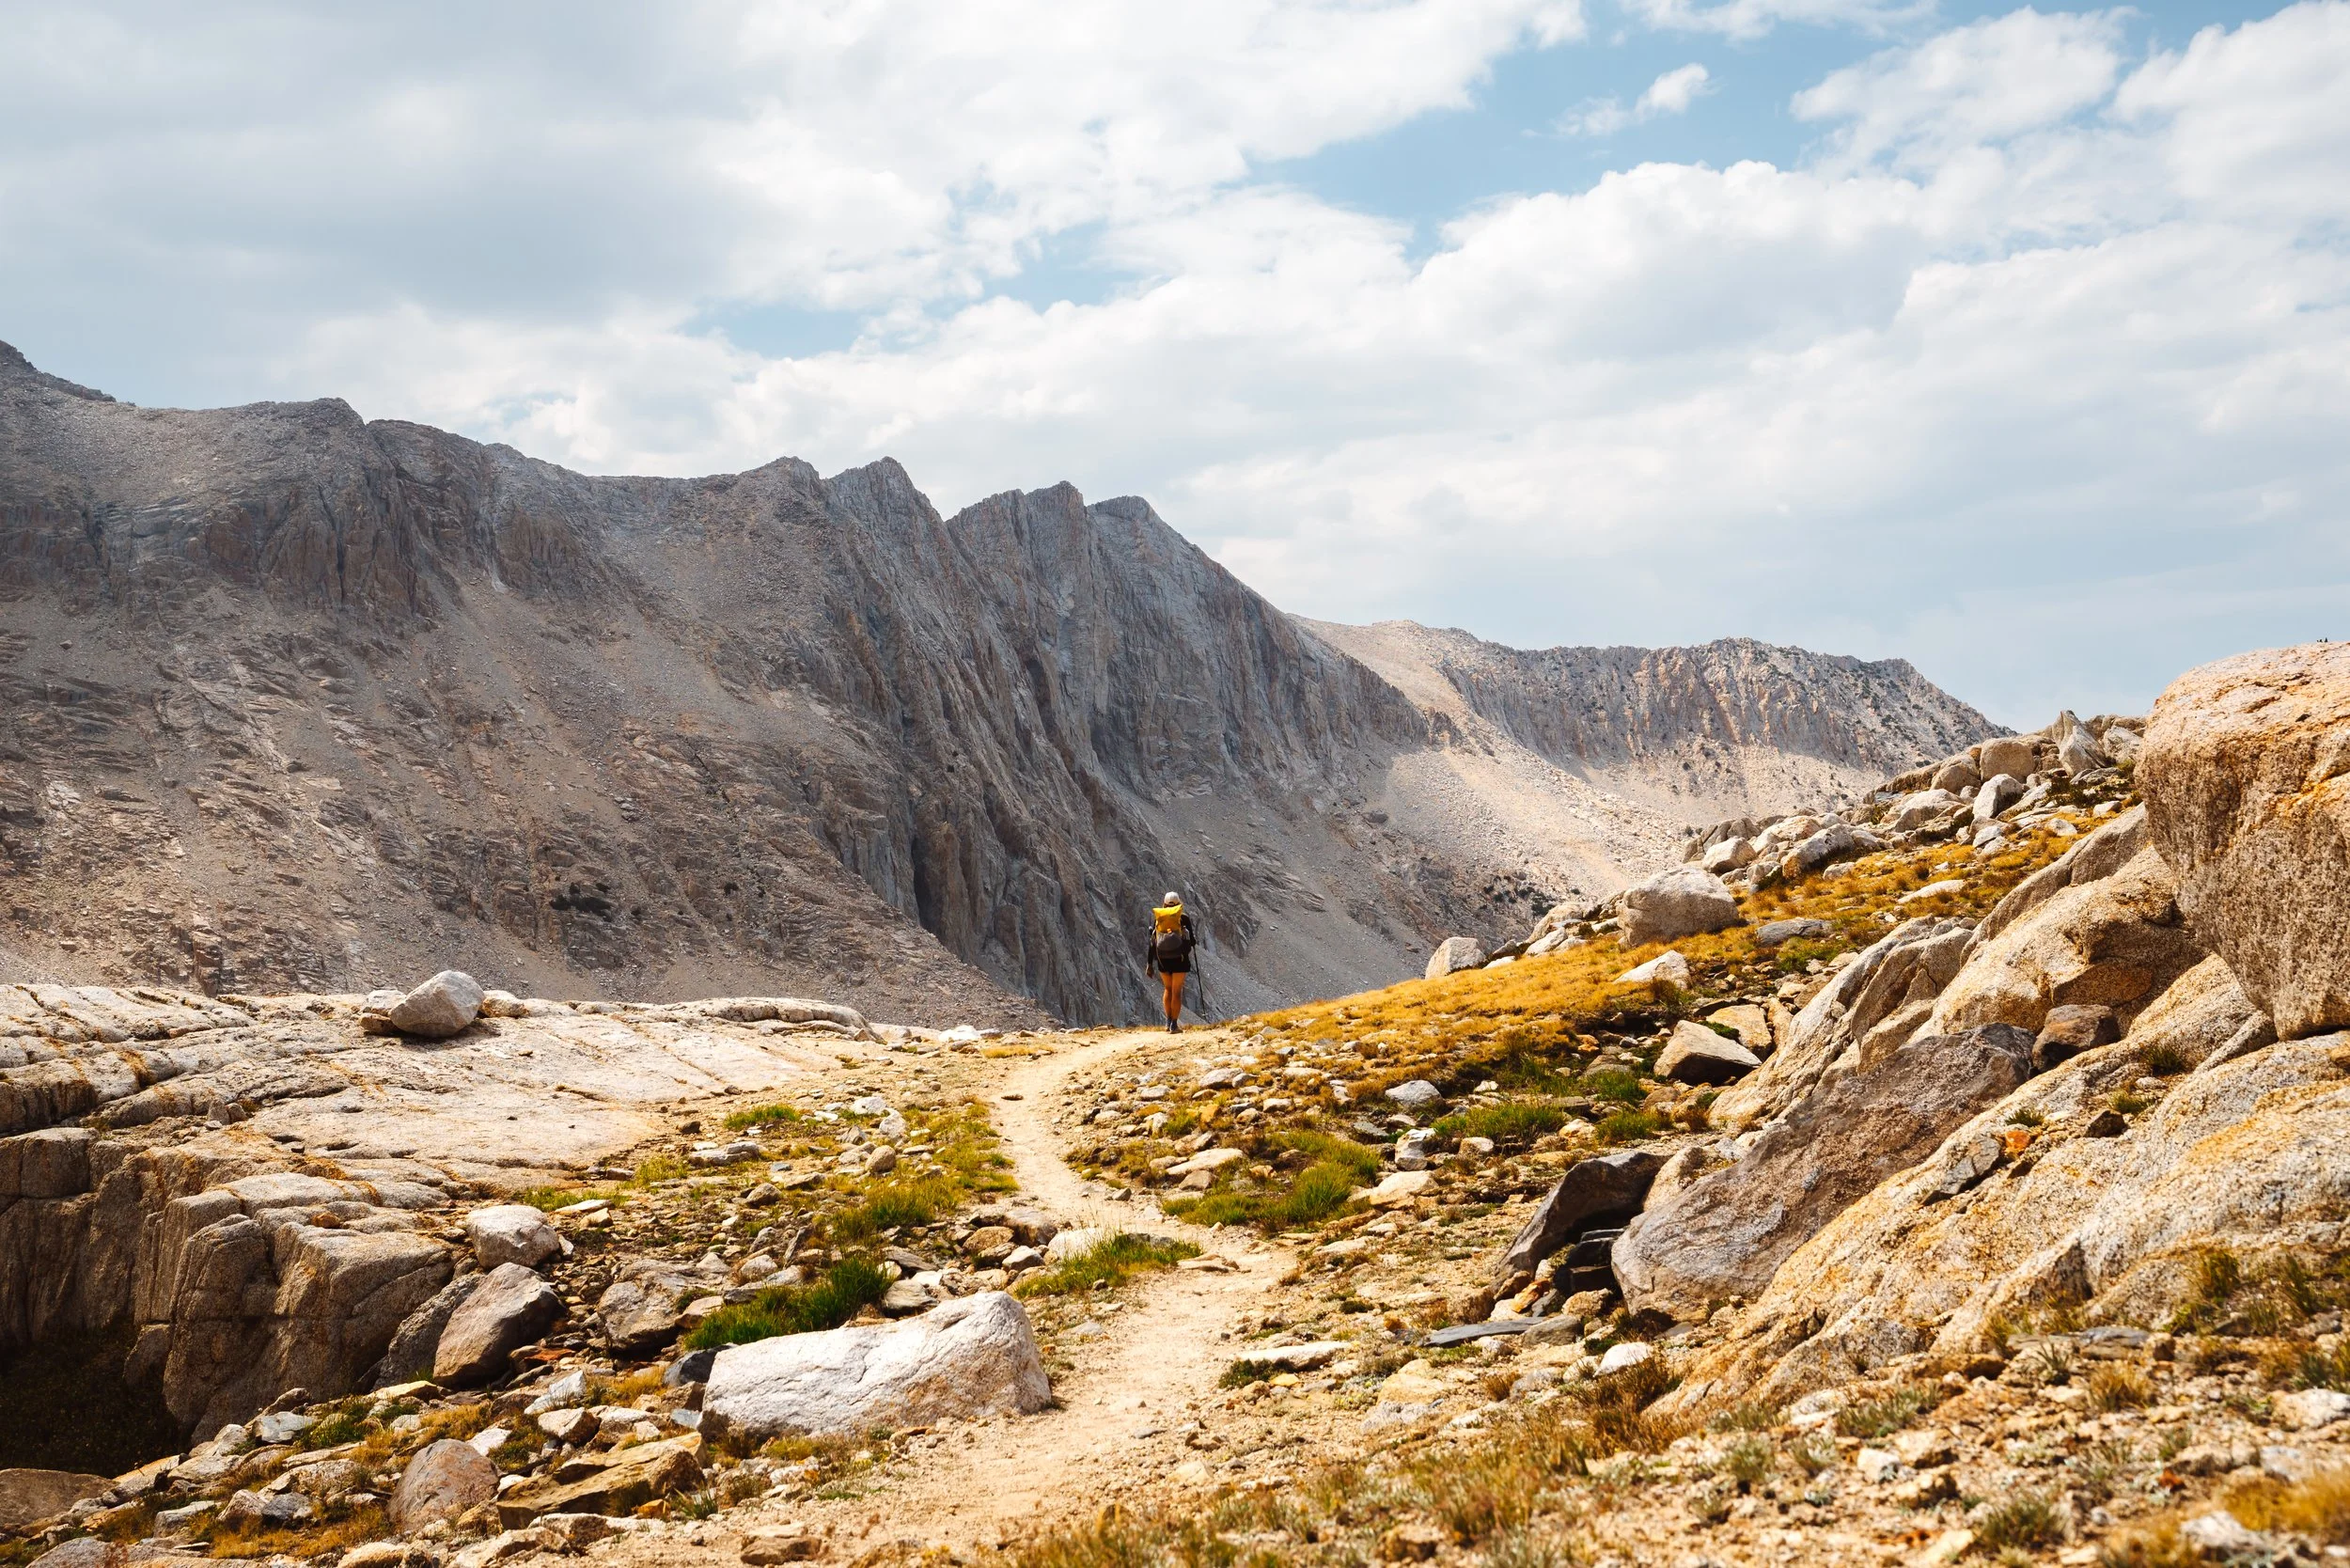
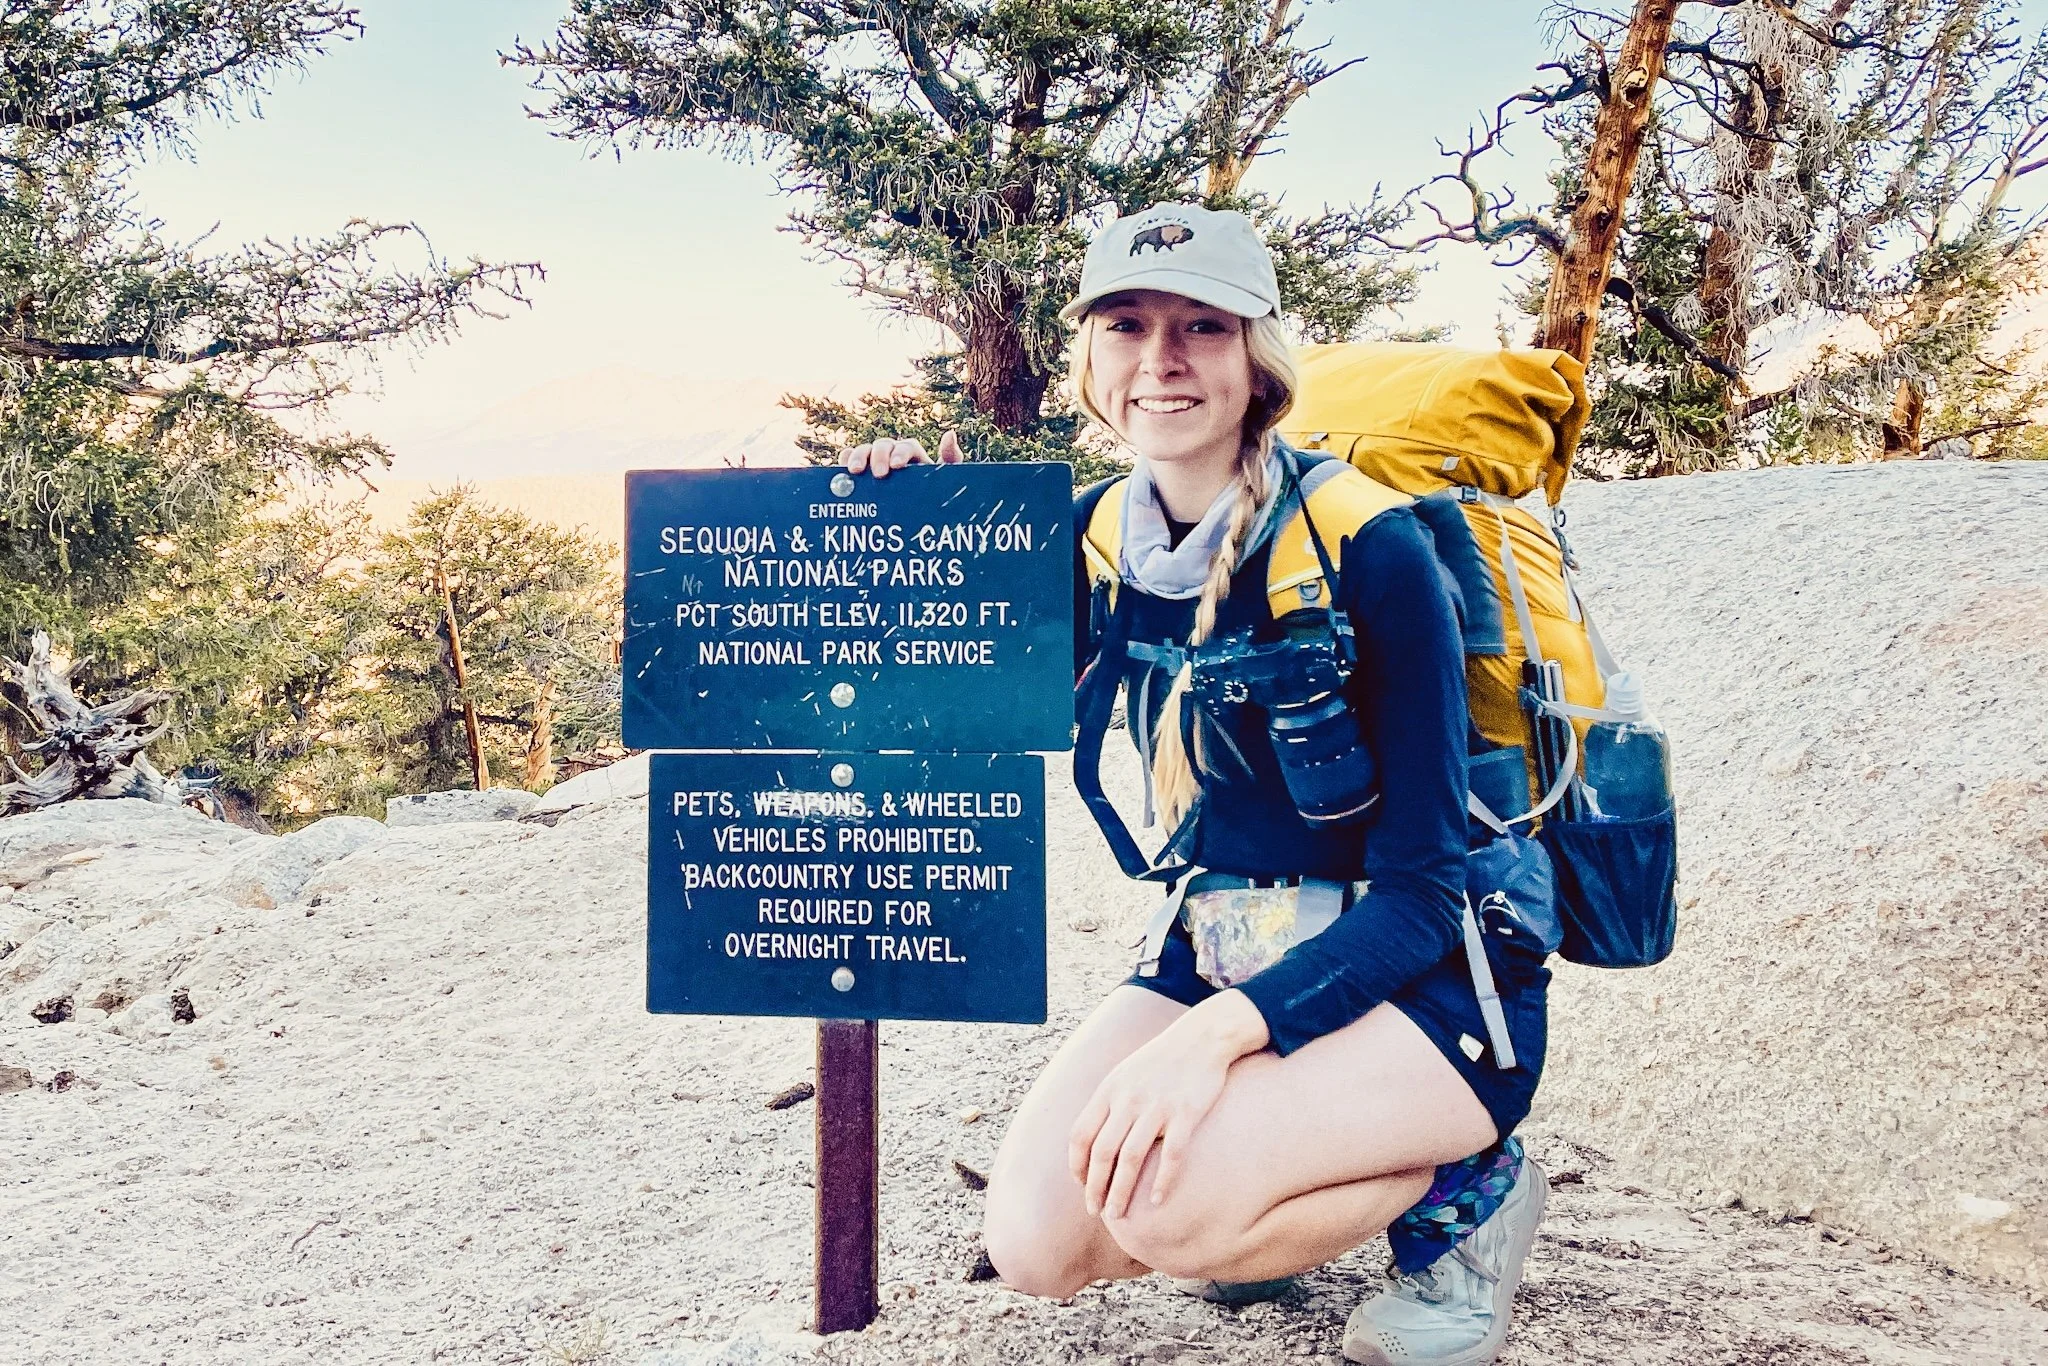
Are you planning your own John Muir Trail (JMT) thru-hike or another backpacking trip? (Also check out: How to Get a John Muir Trail Permit for the 2024 Hiking Season and also John Muir Trail Resupply Guide!) Once I obtained my John Muir Trail permit, I next started thinking about what gear I would take on my hike, which took a lot of research and test runs to find the best setup for me. In this post, I’ve compiled the entire packing list of gear that I took with me on the John Muir Trail (JMT).
My base weight (base weight is the weight of all your gear not including your worn weight, e.g. clothes you wear and shoes, or consumables like food, water, and fuel) was around 16-lbs for the John Muir Trail, which is considered on the lighter end (but not quite ultralight thanks to my 4 lbs of camera gear). I’ve organized my JMT gear into the following sections if you want to jump ahead:
Affiliate Disclosure: This blog post contains affiliate links, which means that if you click on a link and make a purchase, I receive a small percentage at no additional cost to you. This helps me continue to provide free resources for you! Thank you so much for supporting my work and helping me keep these resources available. You can read more about my affiliate policy here.
Let’s Connect: Instagram • TikTok • YouTube • Join My Newsletter | Enjoy This Post? Ways to Support this Blog
Backpack

Backpack
Gossamer Gear Gorilla 50 Ultralight Backpack - Yellow, Size Small
Prior to hiking the John Muir Trail, I typically used a 31L pack for my backpacking trips, but on the John Muir Trail I needed something a little bit larger so I could fit my bear can (bear cans are required on the John Muir Trail to prevent bears from getting your food and scented items). I fell in love with Gossamer Gear’s Gorilla backpack the more I used it and I think it’ll be my go-to backpacking pack for any upcoming trips when I need more capacity.
I don’t always need all of the space in the pack, but it still rolls up nicely without feeling awkward if it is not completely full. What’s also really cool about this pack is that the back pad can also be taken out and used as a seating pad, which definitely came in handy when hanging out after I set up camp on the JMT. This pack is intended for a lighter backpacking gear kit. Its max carry capacity is 30 lbs and for comfort 25 lbs. My base weight for the JMT was around 16 lbs and with food and water, probably around 25 lbs. Since I made sure to not go over the comfort weight, I found the Gorilla pack extremely comfortable. If you have a higher base weight, I recommend getting an alternate pack that will be more comfortable with more weight.
For more backpack recommendations, check out the following:
Pack Liner
The Gossamer Gear Gorilla pack is not waterproof, so it was very important to keep my essential gear in a dry bag just in case it rained (e.g. sleeping bag, jacket, extra clothes, electronics). I lined my bag with a Nylofume® Pack Liner for my JMT thru-hike to keep everything dry. These bags are fully waterproof, ultralight (weighing in at only 0.91 oz), and super cheap at only $2.79 a bag. They are also odor resistant, but you still need to carry a bear can on the John Muir Trail, as I mentioned above.
Shelter

Tent
For the John Muir Trail, my tent of choice was Gossamer Gear’s “The One”, an ultralight (17.7 oz) one-person trekking pole tent. This means that you can use your trekking poles to hold up the tent and it is not freestanding. I chose to carry one trekking pole and carry a single collapsible tent pole instead (just my personal preference - I prefer to hike with one trekking pole instead of two). At 5’4’’, this tent was super roomy for my height. It is a single-walled tent, so depending on your campsite choice you might get some condensation, but I didn’t find it to be a huge problem. I truly believe this is one of the best ultralight one-person tents out there and it doesn’t come at too high of a price-tag.
Tent Pole
Six Moon Designs 5 Section Pole - 49” Aluminum x1
As mentioned above in the tent section, I used one 49’’ Six Moon Designs 5 section aluminum pole along with a trekking pole to setup my tent. This tent pole weighs in at only at 3.7 oz, which is much lighter than carrying a second trekking pole that I wouldn't be using. Plus, I like how small this pole folds up.
Stakes
Vargo Ti Shepherds Hook Stakes
I brought six (6) of the Vargo Ti Shepherds Hook Stakes with me on the John Muir Trail. These are extremely durable and ultralight stakes, weighing in at less than 1/3 an ounce each (8 grams).
Ground Sheet
Duck Brand Indoor Window Shrink Film Insulator
Ok, this one might throw you for a loop unless you’re familiar with the things people do to make their backpacking gear ultralight. As a ground sheet, instead of a traditional ground sheet you buy, I used window plastic covering (Duck Brand Indoor Window Shrink Film Insulator) cut down to the size of my tent’s footprint on the JMT, approximately 117’’x103’’. You might be wondering…why? Because it is super light at only 50g (1.76 oz)! And it packs down really well to stuff in your bag. Since it’s just a cheap sheet of plastic, it’ll likely rip, so be careful with it.
Sleep System for the John Muir Trail
Sleeping Quilt
Hammock Gear 20°F (-6°C) Premium Burrow Short/Wide + 1 oz overfill
I took my Hammock Gear 20°F Premium Burrow quilt with me and it kept me very comfortable. I was worried the 20°F temperature rating was overkill, but it got below 30°F my last few nights on trail and I was extremely happy I did have my 20°F quilt. Curious what a sleeping quilt is? It’s like a sleeping bag without the back so it is lighter.
Check out my blog post Ultimate Backpacking Quilt Guide: Why I Use a Quilt Instead of a Sleeping Bag for 3-Season Backpacking for more information about quilts and why I prefer using them over sleeping bags.

Sleeping Pad
Therm-a-Rest NeoAir Xlite Ultralight Backpacking Air Mattress, Size Small (20x47 inches)
For my sleeping pad on the JMT, I used the Therm-a-Rest NeoAir Xlite Ultralight Mattress in size small (this exact model is no longer available, here is the 2023 updated version). I like how light this sleeping pad is, but it does crinkle a lot. Also a note on the size - I use a size small. I’m 5’4’’ and this does not cover the full length of my body. My feet hang off the end, but I just put my backpack at the bottom to set my feet on when I sleep. I chose this length to save some weight and space in my bag, but if you are looking to cover the length of your body, I recommend getting either the Regular or Large depending on how tall you are.
Pillow
Sea to Summit Aeros Premium Pillow
For the JMT, I took the Sea to Summit Aeros Premium Pillow in size regular. This is my go-to backpacking and camping pillow. It’s inflatable and super light.
Clothes for the John Muir Trail

Shirt
Patagonia Women's Long-Sleeved Capilene Cool Merino Shirt
I chose to wear the Patagonia Long-Sleeve Capilene Cool Merino Shirt for my JMT thru-hike because it's very breathable, light, and made of merino wool which helps control odor. I also opted to wear long sleeves for sun protection. I liked this shirt, but it did get pretty sun-faded by the end of my two-week thru-hike. Since hiking the JMT, I have become a big fan of sun hoodies for additional sun protection. A few of my favorite sun hoodies for thru-hiking are:
Shorts
I absolutely loved wearing my Vuori Dash Shorts on my JMT thru-hike. These shorts are super comfortable, breathable, moisture-wicking, quick-drying, have an anti-odor finish, and they have multiple zippered pockets (my absolute favorite part). The zippered pockets were super handy to keep snacks in. These are still some of my favorite shorts for hiking.
Socks
Darn Tough Run Quarter Ultra-Lightweight Cushion Socks
Darn Tough’s Run Quarter Ultra-Lightweight socks are my go-to running and summer hiking socks. These socks are just cozy, super lightweight, quick-drying socks. Plus, I love Darn Tough’s lifetime warranty if the socks wear through or get holes. For my John Muir Trail thru-hike, I brought two (2) pairs of these socks with me. I wore one pair during the day and the second pair was just backup just in case my other ones got wet. Since hiking the JMT, I have become a big fan of Injinji Ultra Run Mini Crew Socks for thru-hiking.
Shoes
Altra Lone Peaks with Superfeet Green Insoles
A few years ago, I made the switch to Altra Lone Peaks as my go-to hiking, backpacking, and running shoe so I knew I would stick with them for my JMT thru-hike. These shoes are super lightweight, have a wide toe box, breathable, and dry quickly, which is great if they get wet. Since Lone Peaks are zero-drop shoes, I like to pair them with Superfeet Green Insoles for some added support.
Gaiters
Ever get annoyed about rocks getting into your shoes while hiking? Gaiters will solve that problem. Gaiters slip over your ankle and attach to your shoes to help prevent getting dust, dirt, and rocks in your shoes. I personally use Dirty Girl Gaiters because they have a lot of fun patterns rather than just plain black. For the John Muir Trail, I wore the pattern “Leaf No Trace”. Another good gaiter option are the Altra Gaiters.
Buff
High Tail Designs Hiking Gaiter "Eldorado Canyon"
Wearing a buff on the JMT helped keep the sun off my neck while hiking. I chose to wear my High Tail Designs hiking gaiter in the pattern “Eldorado Canyon”, which is a beautiful watercolor buff. I loved having this beautiful pattern as part of my hiking attire - it made me happy. I also used this as a sleep mask the night I went to bed at 4 pm so I could wake up at 12 am and summit Mount Whitney for sunrise.
Hat
Keep Nature Wild Stay Wild Bison Dad Hat
For a hat, I just chose a standard ball cap, nothing special. On the JMT, I wore Keep Nature Wild’s Stay Wild Bison Dad Hat. I thought the buffalo was super cute. If you’re looking for a little more sun protection, I recommend a Tilley sun hat.
Sun Gloves
Outdoor Research ActiveIce Sun Gloves
On the John Muir Trail, you’re almost always in the sun, so protecting your skin as much as possible down to your hands is important. Wearing Outdoor Research’s ActiveIce Sun Gloves was very important to help protect my hands. These gloves are made of UPF 50+ fabric and helped kept my hands cool.
Underwear
The Patagonia Active Hipster Underwear is my favorite hiking underwear because they are soft, comfortable, moisture-wicking, and have an odor control treatment. These are super comfortable and I never chafed with them. They can also double as swimming bottoms if you want to jump in one of the many lakes. I wore one pair on the JMT and brought an extra to switch off prior to doing laundry.
Sports Bra
I like this sports bra so much I still wear it on a daily basis. Patagonia's Active Mesh Bra is also made of odor-control and moisture-wicking fabric and is still super soft. It's medium support, so I wouldn't recommend running in it, but I've loved it for backpacking and hiking. This bra also doubled as my swimsuit top on the JMT. Another sports bra I really like for thru-hiking and is now my favorite bra is the Vuori Yosemite Bra.
Fleece Leggings
I have this fun cold allergy where if I get really cold, my skin will break out in hives, so it was important for me to consider when this might be an issue on my John Muir Trail thru-hike. I knew that summiting Mount Whitney at sunrise would likely be the coldest part of the trip, so I started out carrying my Baleaf Fleece Lined Leggings (which are typically only $30-$35) and wore these when I hiked at 1:00 am in the morning and submitted Mount Whitney at 5:00 am. It was definitely very chilly and windy at the top, and I’m glad I had these leggings for that part of the hike. After summiting Mount Whitney, I chose to mail home my fleece leggings at my first resupply stop at Onion Valley, which I think was a good call for me because I didn't really need them at any other point of the trip.
Fleece Gloves
Outdoor Research Vigor Heavyweight Gloves - Women’s
The same story as the leggings - I mailed home my Outdoor Research gloves after summiting Mount Whitney on the JMT, but I actually wish I had kept these with me because on the last couple days of my hike, it dropped below 30 degrees Fahrenheit at nighttime so the mornings were a little chilly. I’ll probably carry these for the entirety of my next thru-hike.
Wind Pants
To help keep my legs warm when it was windy or cold, I chose to bring these Body Wrappers Ripstop Pants on the John Muir Trail. These are very thin, ripstop, lightweight pants (mine weigh in at 3.0 oz) that are actually intended as dance pants for dance warm-ups but can also be used for hiking. I often wore them in the mornings when it was chilly and I had just started hiking. I warmed up pretty quickly in them and would typically take them off in the first mile or two.
Puffy Jacket
Enlightened Equipment Women’s Torrid Jacket
If you’ve been following me for a while, you know I love my Arc’teryx Cerium Down Hoodie as my go-to day hiking jacket. However, for backpacking, I sometimes like to take my Enlightened Equipment Torrid Jacket, which I did take on my John Muir Trail thru-hike. My Torrid jacket is a bit lighter at only 5.7 oz. Also, it's made of synthetic insulation, rather than down insulation like the Cerium jacket. Synthetic insulation allows the jacket to maintain warmth and breathability when damp, which is not the case with down insulation.

Sleep Socks
Darn Tough Hiker Micro Crew Socks - Women's
I wore the Darn Tough Hiker Micro Crew Socks as sleep socks on the JMT. There is no better feeling than putting on a fresh pair of socks at the end of a long day of hiking. At night time, I hang my hiking socks in my tent to air out and switch into these. I love how warm and cozy these socks are (they are also my primary winter hiking sock).
Rain Jacket
Frogg Toggs Women's Ultra-Lite2
At least when I hiked the John Muir Trail, it didn’t rain much. There was an occasional afternoon storm or light rainfall, but not much more. I chose to carry my Frogg Toggs Women’s Ultra-Lite2 rain jacket because it is super lightweight and is extremely good at keeping you dry. It can also double as a wind jacket. This rain jacket is both extremely budget-friendly and very effective at keeping you dry.
Mask
High Tail Designs no longer makes this mask, but I got one of their masks back in 2020 and took it with me on the JMT.
Beanie
For the John Muir Trail, I just took a random beanie I already had. Similar beanies include this Carhartt beanie or this Coal beanie.
Camera Gear
I’m a photographer, so bringing a full camera setup instead of just using my iPhone or a point-and-shoot camera was non-negotiable. I knew this meant extra weight, but that’s why I try to make the rest of my gear lightweight. My camera is most definitely my “luxury item” of my entire gear setup for the JMT, but I don’t regret bringing it at all.
Camera
The Sony A7RIII is a mirrorless digital camera and it is such a powerhouse with a 42mp sensor, which allows for large prints or zoomed-in crops. I love how powerful it is but still lightweight.
Lens
Tamron 17-28mm f/2.8 for Sony E
I chose to only bring one lens for my John Muir Trail thru-hike. I chose the Tamron 17-28mm wide-angle lens because I knew I would be hiking through wide, mountain vistas and also seeing a lot of alpine lakes. This lens was perfect for capturing the wide-open landscapes I encountered on the trail. I think there were less than 5 times I wish I had a bit more zoom, so I didn’t regret the lens choice I made.
Tripod
Apexel Extendable Tripod for DSLR Camera and Smartphone
I searched high and low for a small, lightweight tripod I could take on the John Muir Trail. I know some people will take a full-sized tripod (yikes on weight), a Gorillapod, a PEDCO Ultrapod, or just not take a tripod at all, but one of my favorite types of photography is when you add a human element to wide-open landscapes. I take all of my self-portrait photography, so having a tripod was important to me. I finally found the right tripod for me, the Apexel Extendable Tripod for DSLR Camera and Smartphone. I like this one over the others because it's extendable (can change height up and down), a bit more sturdy than the other options, and it has a phone mount which was great for taking videos or photos on my camera. It’s still lightweight at only 7.4 oz.
Camera Clip
Peak Design Capture Camera Clip
I’ve been using the Peak Design Capture Camera Clip for more than two years and it has been one of my favorite accessories to use while hiking. The Capture Clip clips onto your bag strap, allowing quick and easy access to your camera while out on adventures. On the JMT, I loved how easily I could access my camera while hiking using this clip.
Camera Batteries
Watson NP-FZ100 Lithium-Ion Battery Pack (x3) and Sony NPFZ100 Z-series Rechargeable Battery Pack (x1)
I brought four (4) total camera batteries with me on the JMT, which lasted me my entire hike without having to recharge until I arrived in Yosemite Valley. This saved me time at my resupply stops and also allowed me to use my power bank entirely for my phone and Garmin inReach Mini.
Lens Filter
Polar Pro Circular Polarizer Filter | Quartzline
This polarizer has been essential to my photography when I need to eliminate glares, reflections, or haze from a landscape. I use my polarizer primarily when shooting landscapes with lakes and have never regretted having it with me. This polarizer came in super clutch on the John Muir Trail because there were so many lakes to photograph and this really helped capture their beauty without the glare and reflection.
Lens Cloth
I just brought a generic microfiber lens cloth like this.
Electronics
Headlamp
When backpacking, headlamps are one of the core pieces of gear you should have. This is useful for night hiking, early mornings, or just rummaging around your tent. I personally love the Nitecore NU25 headlamp because you can charge it with a power cord and power bank instead of having to carry extra batteries, which I think is super convenient.
GPS Location and Messaging Device
The Garmin InReach Mini is a GPS device that allows my family to track my location and also send messages back and forth if needed. It also has an SOS button that contacts search and rescue should I get into an emergency. I like how small and lightweight it is, but there are larger devices available that give you a map of your location if you are interested in that. This was definitely a key piece of gear for me on my JMT hike.
Phone
No major notes on this one, just that I love the size of the iPhone 12 mini. I used to have an iPhone 8+ and my hands used to cramp holding it, so I much prefer the mini. The camera on this phone is also super good and I filmed a lot of nice videos using my phone when I hiked the John Muir Trail.
Battery
Not exaggerating, I couldn’t decide between the Anker Powercore 20000 mAh or 10000 mAh up until the minute I was dropped off at the airport the day I flew out to go hike the John Muir Trail. I honestly wasn’t sure if I would need the extra battery power because I had never done a trip this long before. I ultimately chose the Anker PowerCore Speed 20000 mAh to be safe and I’m happy I did. Having the larger battery allowed my first resupply stop to be super quick - all I did was pick up my pre-shipped box at the post office and I headed back to the trail, rather than having to sit for a couple of hours and charge everything. I didn’t need to charge my battery until day 9 of my trip, which I thought was super impressive.
Earbuds
Apple EarPods with Lightning Connector
Prior to the John Muir Trail, I thought I would listen to a lot of music or podcasts, but I honestly didn’t end up listening to much at all. On the occasional listen, I would use my corded Apple Earpods.
Charging Cords
On the JMT, I brought a Micro USB cord (for charging my power bank, headlamp, and GPS device), a USB-C cable for charging my camera, and an iPhone lightning charging cord to charge my phone.
Wall Adaptor
Anker Quick Charge 3.0 39W Dual USB Wall Charger
This wall charger allows you to charge two devices at once, which is important for having an efficient resupply and charging stop on the JMT. This Anker wall adaptor also has quick-charging capability.
Cooking Gear for the John Muir Trail
Pot
TOAKS Light Titanium 550ml Pot
This pot is perfect if you are just heating water for one person. On the JMT, I only ever boiled water for my dinners and this was the perfect size to heat enough water for my Backpacker’s Pantry meals. It’s super lightweight and cools off very quickly.
Stove
This stove is ultralight (2.6 oz) and compact (2x2x3 in). It folds up nicely and fits into my pot. Plus, it boils water very quickly.
Titanium Spoon
TOAKS Titanium Long Handle Spoon
The long spoon is very necessary for eating out of one of the backpacking meal bags. It allows you to scrape every corner of food out of the bag without getting your hands all messy.
Fuel + Lighter
Fuel is not technically part of your base weight, but I thought it was important to share that on the day I started my JMT hike, I picked up a 100g fuel can from one of the gear stores in Lone Pine, CA since you can’t fly with a fuel can (for obvious reasons). I opted for the small fuel can size because I would only be using it to boil one pot of water each night and the one fuel can lasted my entire two-week hike. I also just picked up a generic lighter from the gear store, too.
Bear Canister
Not exactly cooking-related, but an approved bear canister is required on the John Muir Trail to store your food. I opted for the BearVault BV450 which stores about 4-5 days of food for me. I was already timing my resupplies to be every 4-5 days, but if you think your resupply stops will be separated by a greater number of days or you eat more than I do, I recommend sizing up to the BearVault BV500, which holds around 7 days of food.
Water Filtration System for the John Muir Trail
Water Filter
Sawyer’s water filters are my absolute favorite because they attach easily to most generic store water bottles, specifically smartwater bottles. On the JMT, I only carried the actual piece that attached to the water bottle (not the bags that it comes with). Also, a tip on water filters, I recommend always sleeping with it in your sleeping bag so they don’t freeze overnight (I usually just zipped it into one of my pockets). It’s important to not let your water filter freeze because if it does, the inside tubes expand and split, allowing unfiltered water through which essentially ruins the water filter.
Water Bottles
As mentioned above, I use smartwater bottles in combination with my water filter. On the John Muir Trail, I carried a 1-liter bottle and a 1.5-liter bottle.
Toiletries, First Aid Kit, and Repair Kit
Toiletries
First Aid Kit
Homemade Kit stored in a Plastic Baggy
I typically bring a small amount of each of the following items and replenish my supply in towns, as needed. If you don’t want to buy everything separately, a good place to start is this pre-made travel/mini sized first aid kit or this Adventure Medical Kit, and then you can add in additional items you would like to bring.
Band-Aids - I take a few of each size.
Antiseptic Wipes - Bring a few.
Ibuprofen - I like to bring a small amount and store them in a small pill pouch.
Allergy Medicine (non-drowsy) - I like to bring a small amount and store them in a small pill pouch.
Leukotape - I only bring a small amount, not the entire roll. I like to wrap a small amount of it around my trekking pole.
KT Tape - I bring a few strips.
Tums - I like to bring a few and store them in a small pill pouch.
Repair Kit
Nothing fancy here, just a few items that could be useful if any of my gear breaks:
Duct Tape - I just bring a small amount that I wrap around my trekking pole
Sewing Kit - I usually bring a needle, one small thread roll, and a needle threader
Miscellaneous Gear for the JMT
Maps
Tom Harrison John Muir Trail Map-Pack
If you are using a phone app, such as FarOut Guides, maps are not necessary at all. The trail is very well marked, but I liked having this map set to look at when I took breaks or at the end of the day to learn more about what peaks were around me, along with any other notable landmarks.
Fanny Pack
High Tail Designs Wildflowers Fanny Pack
This is probably another one of my favorite pieces of gear that I took on the JMT. Having a fanny pack is such a game-changer when hiking. I like to put my phone, permit, snacks, and charging cords in here. It’s nice having some core gear that I use throughout the day easily accessible without having to take my backpack off. Plus, the High Tail Designs fanny pack is super fun and colorful.
Trekking Pole
Komperdell Carbon C3 Compact Trekking Pole (x1)
I mentioned this above, but I only used a single trekking pole on the John Muir Trail. It helps me stay stabilized while hiking, but still allows me to have a free hand. I also use it to set up my tent.
Wallet
Nothing fancy here. On the JMT, I just carried a plastic baggy with my license, credit cards, cash, and backpacking permit.
Let’s Connect: Instagram • TikTok • YouTube • Join My Newsletter | Enjoy This Post? Ways to Support this Blog